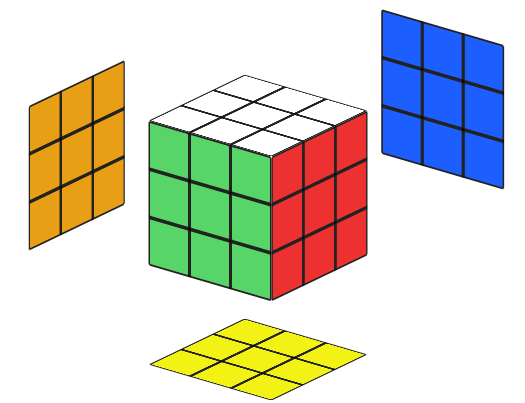
The cube has 6 colored sides, and your goal is to get each side with a single color only.
Piece Types
There are 3 piece types:
Centers
They have a single color, and are the ones that define that side's final color.
Corners
Are made of 3 colors each.
Edges
Are made of 2 colors each.
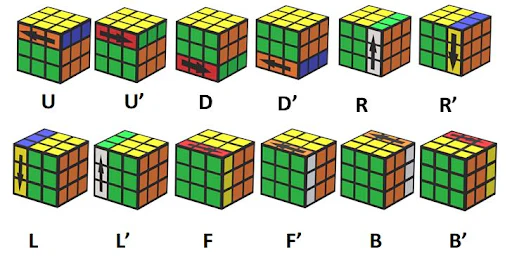
Notation
The cube's moves can be represented as letters, one for each face:
Single letter (e.g., R, U, F) ➔ Move that side clockwise 🔃
Letter with ' (e.g., R', U', F') ➔ Move that side counterclockwise 🔄
Letter with 2 (e.g., R2, U2, F2) ➔ Rotate that side 180°
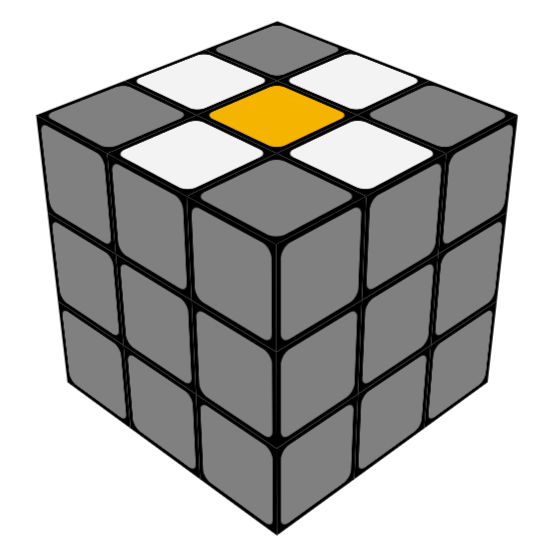
0The Flower
(This is pretty much a pre-step for starters. Once you get more used to the cube you will be able to do the white cross directly.)
Your goal is to achieve something like this:
Note: Don't worry about the gray colors, they don't matter right now.
Also keep the cube's colors in mind. On a regular cube, white is opposite to yellow, so my center is whatever is opposite to white.
On the yellow side, try to get a white edge adjacent to all 4 sides.
1The Cross
On this step, you will only rotate the yellow side, to align the white edges one by one with their respective centers. After that, you rotate that color's side 180°. That way, you will correctly align them on their respective sides.
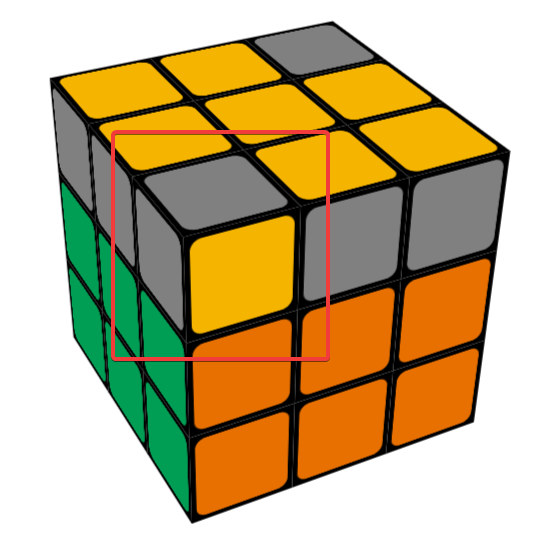
2White Corners
Place your white side to the bottom. Keep it there for the rest of the solve.
On this side, you will try to locate a white corner on the top side, and align it above where it should go. In the example below, I have the white-green-orange corner. So I put it between the green and orange sides. Then I position the cube so that the white sticker of that piece is located on my Front side, and do the following algorithm:
If on the left:
U' L' U L
If on the right:
U R U' R'
💡 Memory Trick
Move the piece to the opposite side. If the piece is on the left, I move it right, and raise the left side up. If the piece is on the right, I move it left, and raise the right side up.
If the white sticker is facing up, you can do either the left or right algorithm. You just have to do it 3 times.
Up-facing (3x algorithm)
⚡ Bonus Tip (Not Required)
If you want to know a faster way to insert the up-facing sticker, you can do the following:
(Green is front)
F' L' U2 L F
After you have done all 4 corners, the first layer should be solved!
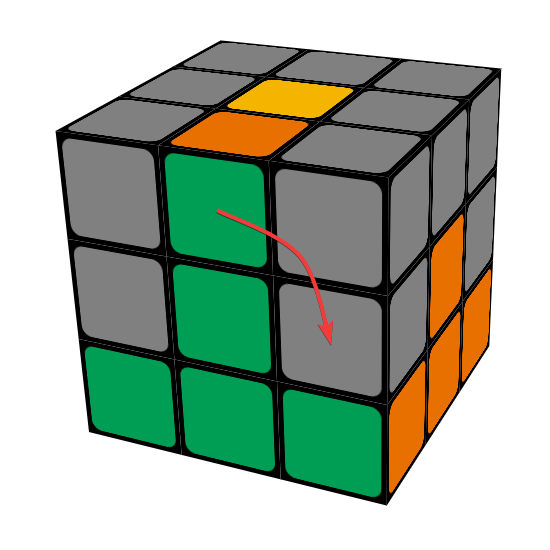
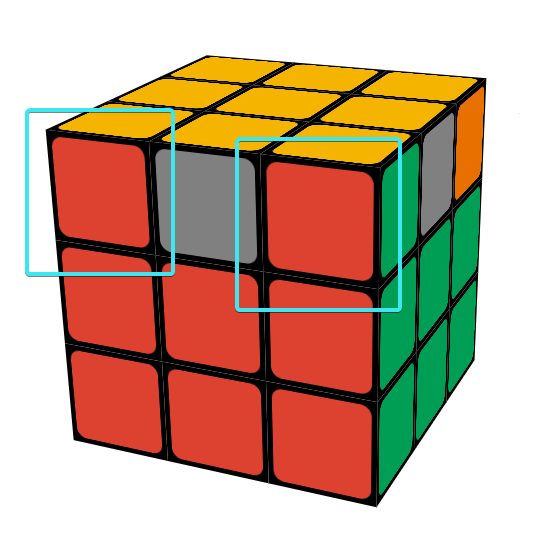
3The Second Layer
For the second layer, you will want to locate an edge piece that does not have the top side's color (in this tutorial, that would be yellow). I will be using the green-orange edge.
Align the sticker that is not on the yellow side to its corresponding center, and take note of which way it needs to go.
If it needs to go to the right:
U R U' R' U' F' U F
If it needs to go to the left:
U' L' U L U F U' F'
💡 Memory Trick
Same as the previous step, mind the opposite side. If the piece needs to go right, I move it left and raise the right side up, then I move it back and lower the right. If the piece needs to go left, I move it right and raise the left side up, then I move it back and lower the left.
After that's done, you can just rotate the cube and repeat step 2, by reinserting the corners.
Note: If the piece is in the correct location but it is inverted, you just do either algorithm to place another piece there instead. That should free up your piece, and you can reinsert it correctly using one of the 2 algorithms.
After doing the 4 edges, your second layer is done!
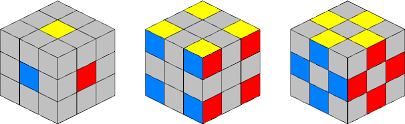
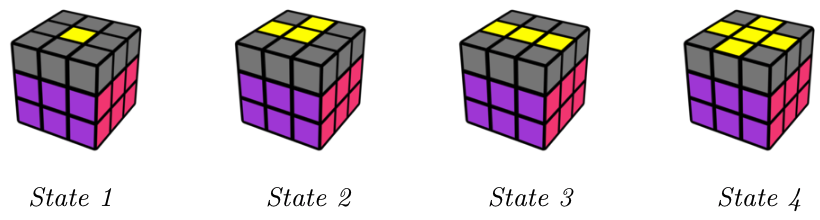
4The Yellow Cross
When you arrive in this part, your yellow side should be in one of these states:
You will do the same algorithm for any of them, just be sure to reorient the top side accordingly.
(State 4 is the goal!)
Yellow Cross Algorithm:
F R U R' U' F'
And there's your yellow cross!
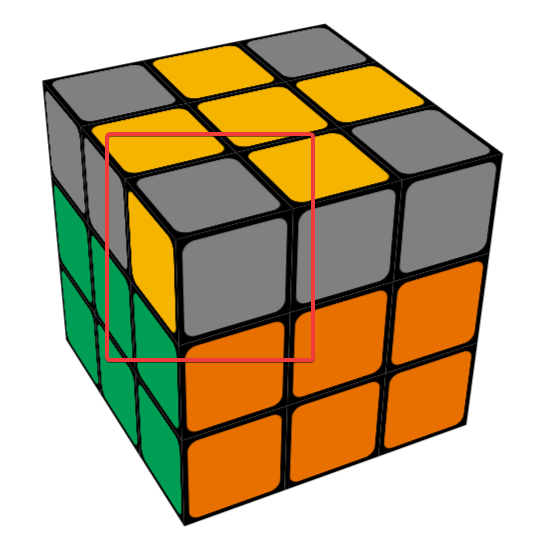
5The Yellow Corners
Once again, there's only one algorithm. Just be sure to position your top side accordingly:
If you have 0 yellow corners facing up: Position a yellow corner on the front left, with the yellow sticker facing left.
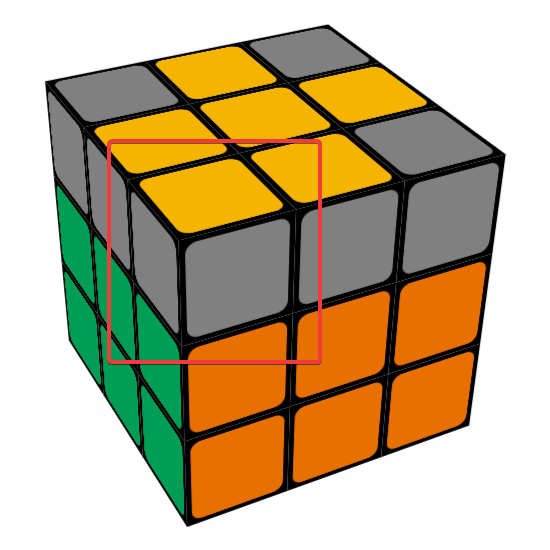
If you have 1 yellow corner facing up: Position that corner on the front left.
If you have 2 yellow corners facing up: Position a yellow corner on the front left, with the yellow sticker facing forwards.
Refer to the images below:
0 corners facing up
1 corner facing up
2 corners facing up
Then, do the following algorithm:
Yellow Corners Algorithm:
R U R' U R U2 R'
You will need to do it 3 times at most.
6Last Layer Corners
For this part, you will have to look at the last layer's corners, and try to find a side with 2 matching corners.
If there are none, you can do this algorithm from any side, and then there will be.
Move the 2 matching pieces to the back side, and do the following:
Last Layer Corners Algorithm:
R' F R' B2 R F' R' B2 R2 U'
One more step to go!
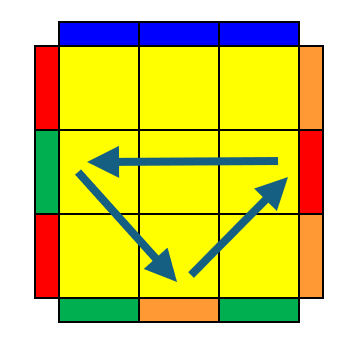
7Last Layer Edges
For this step, you will need to look at the remaining edges. If you have 3 of them in the wrong place, you will either need to rotate them clockwise 🔃 or counterclockwise 🔄.
If you have all 4 in the wrong place, you can do either algorithm once, then one of them will be correctly positioned.
Clockwise 🔃:
F2 U L R' F2 R L' U F2
Counterclockwise 🔄:
F2 U' L R' F2 R L' U' F2
Note: They are almost the same, just the U moves switch directions.
🎉 And we're done! 🎉
Congratulations on solving the Rubik's Cube!